Decadent No-Bake Vegan Chocolate Haupia Pie: A Gluten-Free Hawaiian Dessert Delight
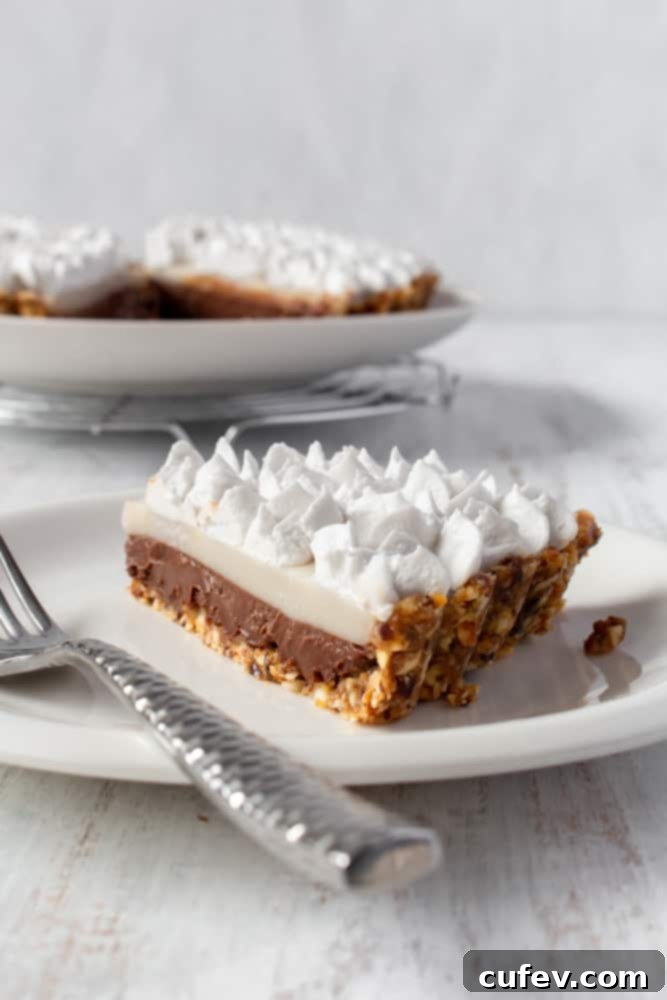
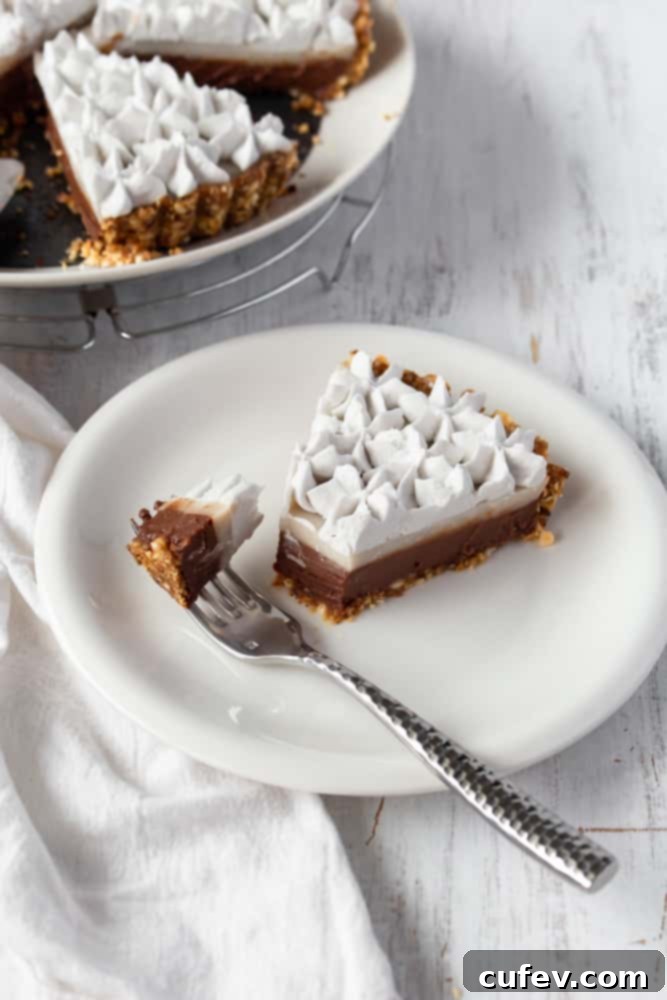
Prepare to be enchanted by this exquisite **Vegan Chocolate Haupia Pie**, a delightful no-bake dessert that reimagines the beloved Hawaiian classic from Ted’s Bakery! This recipe offers a luscious, creamy, and silky texture, all while being completely gluten-free and plant-based. It’s the ultimate make-ahead treat, perfect for those balmy summer gatherings, barbecues, or any occasion when you crave a refreshingly light yet utterly satisfying dessert.
There’s nothing quite like the harmonious blend of rich chocolate and tropical coconut, especially when the summer heat makes the thought of turning on your oven unbearable. This pie delivers on both fronts, providing a cool, indulgent escape that’s surprisingly easy to create. Say goodbye to oven-induced sweat and hello to effortless elegance with every delightful slice of this **creamy vegan chocolate haupia pie**.

What Exactly is Chocolate Haupia Pie?
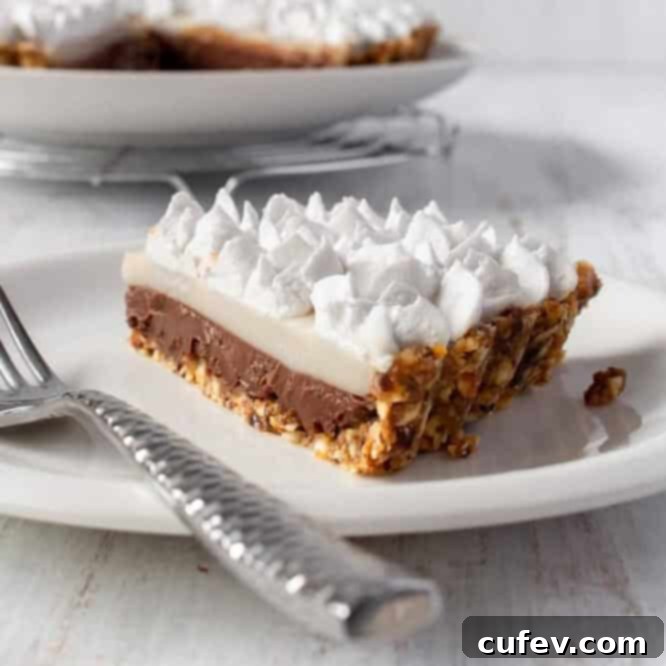
Chocolate Haupia Pie is a celebrated traditional dessert hailing from the beautiful islands of Hawaii, deeply rooted in local culinary traditions. At its heart, it’s a sublime marriage of rich chocolate and creamy coconut. The classic version, famously popularized by Ted’s Bakery on Oahu’s North Shore, typically features a flaky pastry crust, generously filled with a decadent chocolate pudding, and then crowned with a thick, jiggly layer of haupia—a traditional Hawaiian coconut milk custard. The entire confection is often finished with a generous dollop of fresh whipped cream, creating a textural and flavorful masterpiece that’s incredibly popular throughout the islands, particularly at luaus and family gatherings.
While the original recipe often involves baking a traditional pastry crust, our **vegan and no-bake adaptation** offers a modern twist. We understand that on hot summer days, the last thing anyone wants to do is heat up their kitchen. That’s why our version embraces a simple yet flavorful nut and date crust, entirely eliminating the need for any oven time. This not only keeps your kitchen cool but also makes the preparation process a breeze, perfect for busy hosts or those seeking a quicker route to dessert heaven with a **gluten-free Hawaiian dessert**.
The Origins of Haupia: A Hawaiian Delicacy
Haupia itself is a fascinating culinary staple in Hawaiian cuisine, dating back to ancient times. Traditionally made from pure coconut milk, sugar, and a thickening agent like cornstarch (or arrowroot in older recipes), it’s often served in firm squares as a refreshing pudding-like dessert or incorporated into other sweet treats. Its smooth, almost gelatinous texture and delicate, natural coconut flavor make it a versatile ingredient. In the context of a pie, haupia provides a wonderful contrast to the dense, rich chocolate layer, offering a refreshing, authentic, and truly tropical taste of the islands. Our **vegan haupia recipe** captures this essence perfectly, ensuring a truly Hawaiian experience.
Why Choose a Vegan & No-Bake Chocolate Haupia Pie?
Opting for a **vegan and no-bake** version of this classic dessert brings a host of benefits, making it an ideal choice for a wide audience and various occasions:
- Dietary Inclusivity: This recipe is perfect for those following a vegan diet, as well as individuals with dairy or egg allergies and sensitivities. By using plant-based ingredients throughout, everyone at your table can enjoy a decadent slice without compromise, ensuring a delightful experience for all.
- Gluten-Free Goodness: The wholesome nut and date crust naturally makes this pie entirely gluten-free, catering to those with celiac disease or gluten intolerance. It’s a delicious way to ensure everyone at your gathering can partake in a truly special dessert.
- No Oven Required: As mentioned, the “no-bake” aspect is a significant advantage, especially during warmer months. Keep your kitchen cool and comfortable, conserve energy, and avoid the hassle of oven-baking while still creating an impressive, professional-looking dessert.
- Simplicity and Speed: Without the need for baking, the preparation process is often quicker and involves fewer complex steps. This makes it an excellent choice for novice bakers or anyone looking for a stress-free, yet elegant, dessert option for impromptu gatherings.
- A Healthier Twist: The natural sweetness from fresh dates in the crust, combined with the wholesome fats from nuts and nutrient-rich coconut, offers a dessert that feels incredibly indulgent but incorporates more natural, unprocessed ingredients compared to traditional pastry and dairy-heavy fillings. It’s a treat you can feel good about!
- Make-Ahead Champion: This pie truly shines as a **make-ahead dessert**. Its flavors develop beautifully and become even more harmonious as it chills, and its firm structure makes it exceptionally easy to transport and serve. It’s the ideal choice for potlucks, picnics, or any party where convenience and presentation are key.
- Rich & Creamy Texture: Despite being vegan, this pie achieves an incredibly rich, creamy, and silky texture in both its chocolate and haupia layers, rivaling its traditional counterparts. The full-fat coconut milk and quality chocolate ensure a luxurious mouthfeel.
Key Ingredients for Success
Crafting this incredible **vegan chocolate haupia pie** relies on a few core ingredients. Choosing high-quality components will undoubtedly elevate the final taste and texture of your dessert. Here’s a closer look at what you’ll need and why each plays a vital role:
- Coconut Milk: This is the backbone of your haupia layer and contributes significantly to the pie’s creamy richness. It’s crucial to use **full-fat coconut cream from a can**. Look for brands with minimal additives, ideally just coconut and water. For best results, chill the can overnight; the thick, creamy part that separates to the top is what you primarily want. Avoid “light” coconut milk or refrigerated carton varieties, as they won’t provide the necessary richness or set properly for the haupia’s characteristic texture.
- Granulated Sugar: While many sugar types exist, **granulated sugar** is specifically recommended to maintain the pristine, bright white color of your haupia layer. Cane sugar or brown sugar can impart a slight caramel hue, altering the visual appeal. For a truly vegan pie, ensure your chosen brand of granulated sugar is certified bone char-free.
- Chocolate: The quality of your chocolate makes a significant difference in the depth and richness of the chocolate layer. Opt for **good quality dark chocolate**, preferably with a cacao percentage between **50% to 55%**. This range provides a rich, deep chocolate flavor without being overly bitter, perfectly complementing the sweetness of the coconut. Avoid milk chocolate as it won’t yield the same depth of flavor and typically contains dairy. Using chocolate chips designed for baking will make melting easier.
- Non-Dairy Milk: A splash of non-dairy milk (such as unsweetened almond, soy, or oat milk) helps to achieve the perfect pourable consistency for the chocolate haupia filling. Choose your favorite unsweetened variety to complement the overall flavor profile without adding unwanted sweetness.
- Cornstarch: This essential ingredient acts as the primary thickening agent for both the chocolate and haupia layers, giving them their characteristic silky, smooth, and set texture without gelatin. Ensure it’s fresh for optimal thickening results.
- Water: Used to dissolve the cornstarch into a slurry, which is then added to the hot coconut milk mixture. This prevents lumps and ensures even thickening.
- Coconut Whipping Cream: To crown your pie with an irresistibly light and airy topping, **chilled coconut whipping cream** (like Nature’s Charm) is an excellent vegan option. It whips up beautifully, creating a stable and delicious topping. Alternatively, you can use other high-quality vegan whipping creams from a carton or a store-bought tub of vegan whipped topping for ultimate convenience. Always ensure it’s well-chilled for the best whipping results and stability.
- Nuts (Cashews & Almonds) for the Crust: These form the wholesome, no-bake foundation of our pie. The combination provides a delightful chewiness, rich flavor, and essential texture. Use raw, unsalted nuts for the best flavor control.
- Fresh Dates for the Crust: Medjool dates are ideal here. Their natural sweetness and sticky texture act as the binder for the crust, eliminating the need for added oils or sweeteners. Ensure dates are fresh, soft, and pitted for easy processing.
- Fine Sea Salt: A tiny pinch of fine sea salt in the crust helps to balance the sweetness of the dates and chocolate, enhancing the nutty flavors and adding a subtle depth. If your chosen nuts are already salted, you might want to skip or reduce this.

Tips for a Perfect Vegan Chocolate Haupia Pie
Achieving the perfect texture, clean layers, and stunning presentation for your **no-bake vegan chocolate haupia pie** is easier than you think with these helpful tips:
- Chill the Crust Thoroughly: After pressing the nut and date mixture firmly into your pie pan, **always chill the crust in the fridge for at least 20-30 minutes** before adding any filling. A well-chilled crust will firm up beautifully, preventing it from becoming soggy when the warm chocolate filling is poured in. This initial chill also helps the warm filling cool down faster, speeding up the overall setting process for a truly **creamy, silky pie**.
- Chill Each Layer Separately: This is a critical step for creating beautifully distinct and separate layers, which is a hallmark of **Ted’s Bakery’s classic haupia pie**. **Allow the chocolate layer to chill for approximately 10-15 minutes** in the fridge (until it feels slightly set but not completely firm to the touch) before gently pouring the haupia layer on top. This crucial waiting period prevents the two layers from mixing and swirling together, ensuring you get those clean, visually appealing lines that make this pie so striking.
- Ensure Complete Chilling Before Topping: Patience is truly key when it comes to the final setting of the pie. **Chill the entire pie completely in the refrigerator for at least 1-2 hours, or ideally 4 hours (or even overnight), before adding the whipped cream topping.** If the pie is not sufficiently chilled and firm, the warmth from the pie will cause your delicate whipped coconut cream to melt, weep, and slide, ruining both the presentation and the desired texture. A firm, cold base is absolutely essential for a stable and beautiful topping.
- Use a Food Processor for the Crust: For the quickest and most consistent crust texture, a food processor is your indispensable tool. It will efficiently break down the nuts and dates into a fine, sticky crumble, ensuring an even base much more easily than attempting to do it by hand.
- Whisk Cornstarch Mixture Well: When combining water and cornstarch, ensure it’s completely dissolved into a smooth slurry before adding it to the heated coconut milk mixture. Lumps of undissolved cornstarch will result in a grainy, unappealing texture in your filling.
- Constant Whisking is Your Friend: While heating the haupia mixture, especially after adding the cornstarch slurry, **whisk constantly**. This vigilance prevents the mixture from sticking to the bottom of the saucepan, scorching, and ensures a smooth, lump-free, and perfectly thickened custard.
- Achieve the Right Consistency: The haupia mixture should thicken to a consistency similar to a pourable, but still substantial, pudding. It will continue to firm up significantly as it chills in the refrigerator, so don’t expect it to be rock-solid immediately after cooking.
- Use an Offset Spatula for Smooth Layers: An offset spatula is an invaluable tool for gently smoothing out both the chocolate and haupia layers in the pie pan, ensuring an even, professional-looking surface for a polished finish.
- Overnight Chill for Best Results: While an hour or two can get the pie to a sliceable state, an **overnight chill** in the refrigerator is highly recommended for optimal results. This extended chilling period allows all the flavors to meld together perfectly and ensures the pie is fully set, making for easier, cleaner slices and a superior texture.
- Garnish Just Before Serving: For the freshest look and best texture, add your whipped coconut cream and any optional garnishes (like toasted coconut flakes or chocolate shavings) just before serving.

