Irresistibly Fluffy Homemade Apple Doughnuts: Your Ultimate Fall Treat
October is a truly special month, brimming with cozy vibes, crisp air, and a bounty of seasonal delights. Did you know it’s not only National Cookbook Month but also National Apple Month? This delightful coincidence provides the perfect excuse to dive into the world of apple-infused treats. While apple pie often takes center stage as the quintessential apple dessert, we’re taking things up a notch by transforming those beloved apple pie flavors into something utterly irresistible: homemade apple doughnuts! Imagine sinking your teeth into a light, fluffy, deep-fried doughnut, generously filled with a warm, spiced apple compote. These aren’t just any doughnuts; they’re a celebration of autumn, delivering all the comforting essence of apple pie in a fun, handheld form. Get ready to impress your taste buds and everyone around you with this incredible recipe!
Crafting the Perfect Apple Filling: A Symphony of Spices and Fruit
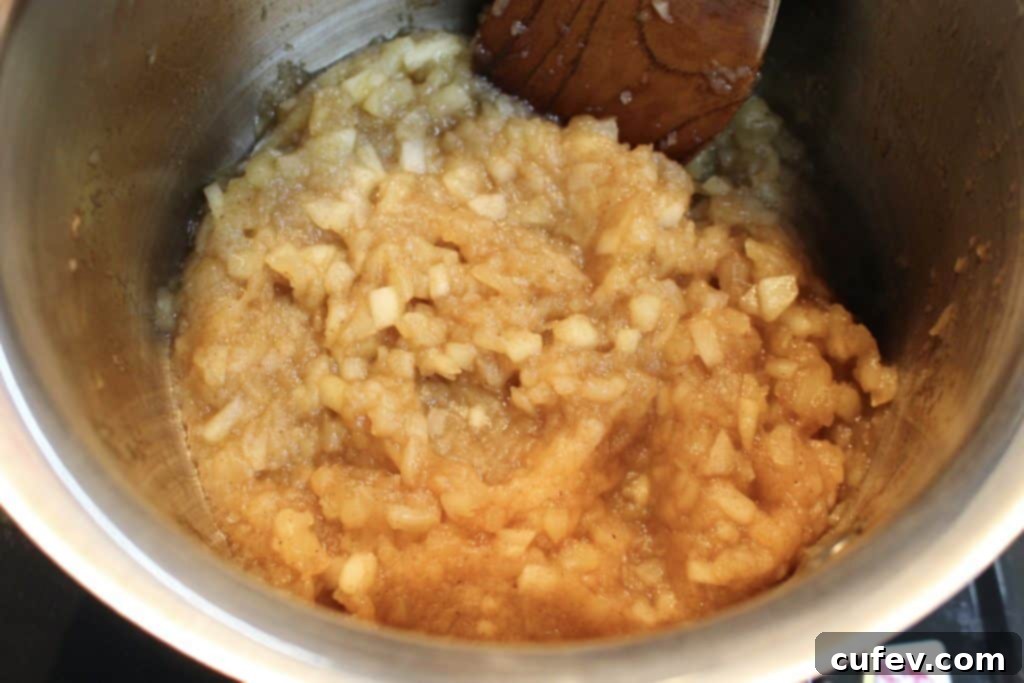
The secret to an extraordinary apple doughnut lies in its filling. We’re not just adding apples; we’re creating a rich, jammy apple compote that perfectly balances sweetness and tartness, infused with classic warming spices. To begin, gather your finely chopped apples. The choice of apple variety is crucial here. For a filling that holds its shape and offers a pleasant tart contrast, firm and acidic apples like Kougyoku (Jonathan apples), Granny Smith, or Honeycrisp are excellent choices. If you prefer a sweeter profile, Fuji or Gala apples can also work, but you’ll want to adjust the sugar accordingly.
Combine your chosen finely chopped apples with sugar, a splash of fresh lemon juice, cornstarch (our thickening agent), and your favorite warming spices in a small saucepan. The lemon juice isn’t just for flavor; it also helps prevent the apples from browning and brightens the overall taste. As for sugar, it’s best to start with a conservative amount – around 3 tablespoons for tart apples. Cook this mixture over medium-low heat, stirring occasionally, until the apples soften and the mixture thickens into a beautiful, jammy consistency. This slow cooking allows the flavors to meld beautifully and the apples to break down without turning into a watery mess.
Once the filling reaches that delightful jammy stage, remove it from the heat. This is the crucial moment for a taste test! The sweetness of your apples can vary greatly, so taste and adjust the sugar as needed until it’s perfectly balanced. Remember, the filling will be even more flavorful once it cools. Transfer the finished apple filling into a bowl and allow it to cool completely before attempting to fill your doughnuts. A warm filling will make your doughnuts soggy and difficult to work with, so patience is a virtue here.
The Foundation: A Fluffy Doughnut Base Made Easy
Creating the perfect doughnut dough can seem intimidating, but with the right technique and a little help, it’s surprisingly straightforward. Our doughnut base for these apple-filled beauties is tried and true, adapted from my popular homemade doughnuts and blueberry cream cheese doughnut recipes. What makes this recipe particularly appealing is its incredible simplicity, thanks to the magic of a bread machine. If you own one, you know the joy of letting it handle all the hard work of kneading and rising. It truly makes homemade baking accessible and enjoyable.
For those looking for a gluten-free alternative to enjoy the deliciousness of apple desserts, you might consider trying a dedicated recipe like this gluten-free apple fritters recipe. While our recipe focuses on traditional flour-based doughnuts, there are fantastic options out there for every dietary need.
Bread Machine Method: Effortless Dough Preparation
Using a bread machine simplifies the dough-making process immensely. Simply add all the dough ingredients into your bread machine pan: bread flour (which gives our doughnuts their wonderful chewiness and structure), sugar for sweetness and to feed the yeast, a pinch of fine sea salt to balance the flavors, skim milk powder for added tenderness and richness, active dry yeast to make our doughnuts rise beautifully, unsalted butter for flavor and a soft crumb, one egg for structure and moisture, and water to bring it all together. Set your bread machine to the “dough” setting, and let it do its work. Typically, this setting involves a kneading cycle (around 10-15 minutes), followed by a resting period, another short knead, and then a dedicated rising time (usually 30-60 minutes). This hands-off approach ensures perfectly kneaded and proofed dough every time.
Stand Mixer or Hand Kneading: For the Traditionalist
If you don’t have a bread machine, fear not! You can achieve equally fantastic results with a stand mixer or by hand. The key is to understand the stages of dough development. For a stand mixer, combine the wet ingredients (water, egg, melted butter) and then add the dry ingredients (flour, sugar, salt, milk powder, yeast). Knead with a dough hook on medium-low speed for about 8-10 minutes, or until the dough is smooth, elastic, and passes the “windowpane test” (you can stretch a small piece thin enough to see light through it without tearing). For hand kneading, mix the ingredients in a large bowl until a shaggy dough forms, then turn it out onto a lightly floured surface and knead vigorously for 12-15 minutes, again aiming for that smooth, elastic consistency. After kneading, place the dough in a lightly oiled bowl, cover with plastic wrap, and let it rise in a warm place until doubled in size, which usually takes 1 to 1.5 hours.
Shaping, Proofing, and Frying: The Path to Doughnut Perfection
Once your dough has completed its first rise and is beautifully plump and airy, it’s time for the next steps: shaping, a second proofing, and finally, frying. These stages are crucial for achieving that characteristic light and fluffy texture.
Shaping the Doughnuts
First, gently turn the risen dough out onto a lightly floured surface. Avoid adding too much flour, as this can make the doughnuts tough. Cover the dough with plastic wrap and let it rest for about 10 minutes. This resting period, known as “bench rest,” allows the gluten to relax, making the dough much easier to roll out without it springing back. Now, using a rolling pin, roll the dough out to an even thickness of approximately ½ inch (1.3 cm). Consistency in thickness is important for even cooking. Next, use a 3-inch (8 cm) round cookie cutter or a clean glass to cut out your doughnut circles. Try to get as many circles as possible from the first roll; gather the scraps, gently knead them together, let them rest for a few minutes, and then roll and cut again.
The Second Rise: Achieving Maximum Fluffiness
Carefully transfer each cut doughnut onto individual squares of parchment paper. This makes handling and transferring them to the hot oil much easier. Place the doughnuts on a baking sheet, ensuring they have enough space between them, then cover them loosely with plastic wrap. Find a warm, draft-free spot in your kitchen and let them rise again until they have nearly doubled in size. This second proofing, or “final proof,” is essential for a light, airy texture. Rushing this step will result in dense doughnuts. This usually takes 30-60 minutes, depending on the warmth of your environment.
Frying to Golden Perfection
As your doughnuts finish proofing, it’s time to prepare for frying. In a large, heavy-bottomed pot or Dutch oven, pour about 2-3 inches of neutral-flavored oil (like vegetable, canola, or peanut oil). Heat the oil to precisely 356°F (180°C). An accurate deep-fry thermometer is your best friend here. Maintaining the correct oil temperature is vital: too cool, and the doughnuts will absorb too much oil and become greasy; too hot, and they’ll brown too quickly on the outside, remaining raw in the middle. Carefully lower 2-3 doughnuts into the hot oil using the parchment paper squares (the paper will easily detach). Fry each doughnut for about a minute and a half per side, or until beautifully golden brown. Use tongs or a slotted spoon to flip them and remove them.
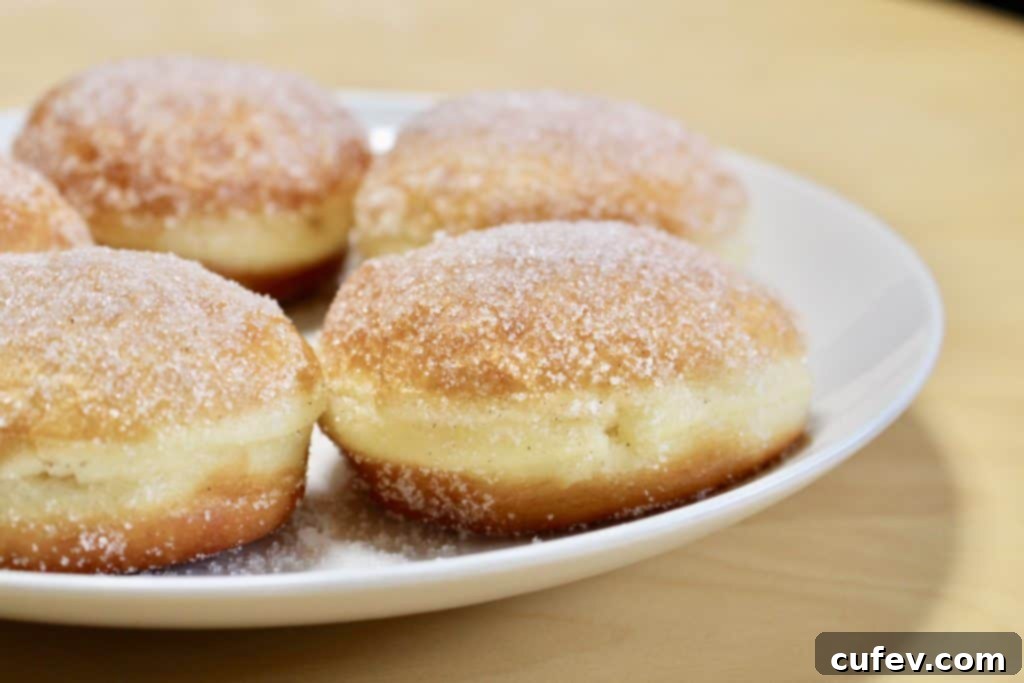
As soon as you take them out of the oil, transfer the fried doughnuts to a wire rack lined with paper towels to drain any excess oil. While they are still warm – this is important – liberally coat them in granulated sugar. The warmth helps the sugar adhere and creates a delightful crispy crust. Repeat the frying process with the remaining doughnuts, making sure the oil returns to temperature between batches.
The Grand Finale: Filling and Serving Your Apple Doughnuts
With your doughnuts perfectly fried and sugar-coated, it’s time for the delicious grand finale: filling them with that incredible spiced apple compote. This step brings the “apple pie doughnut” concept to life!
Piping the Filling
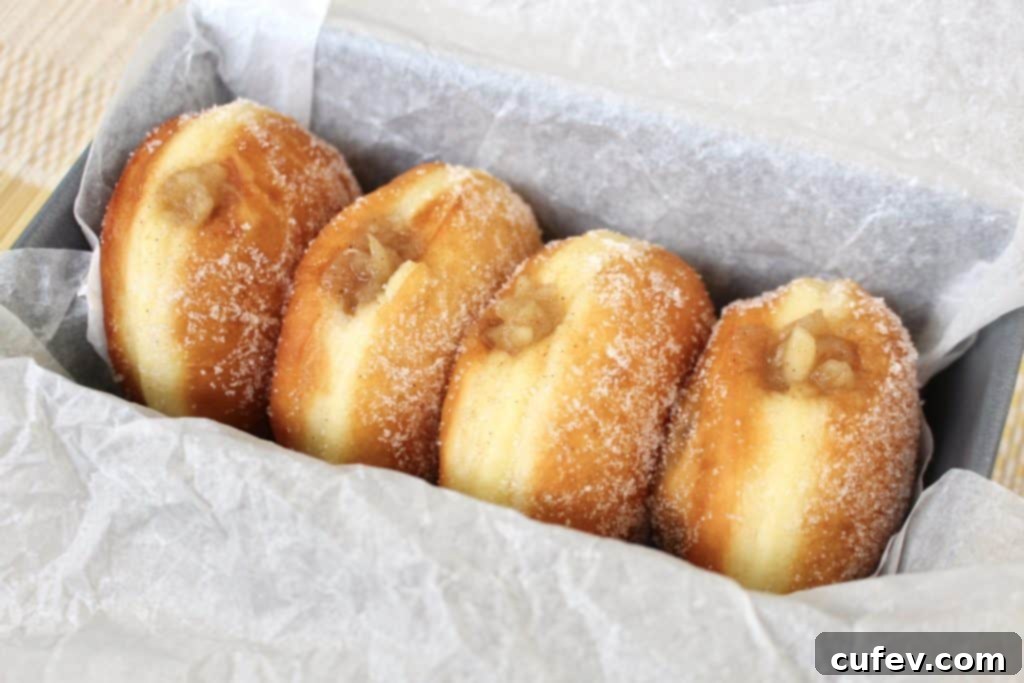
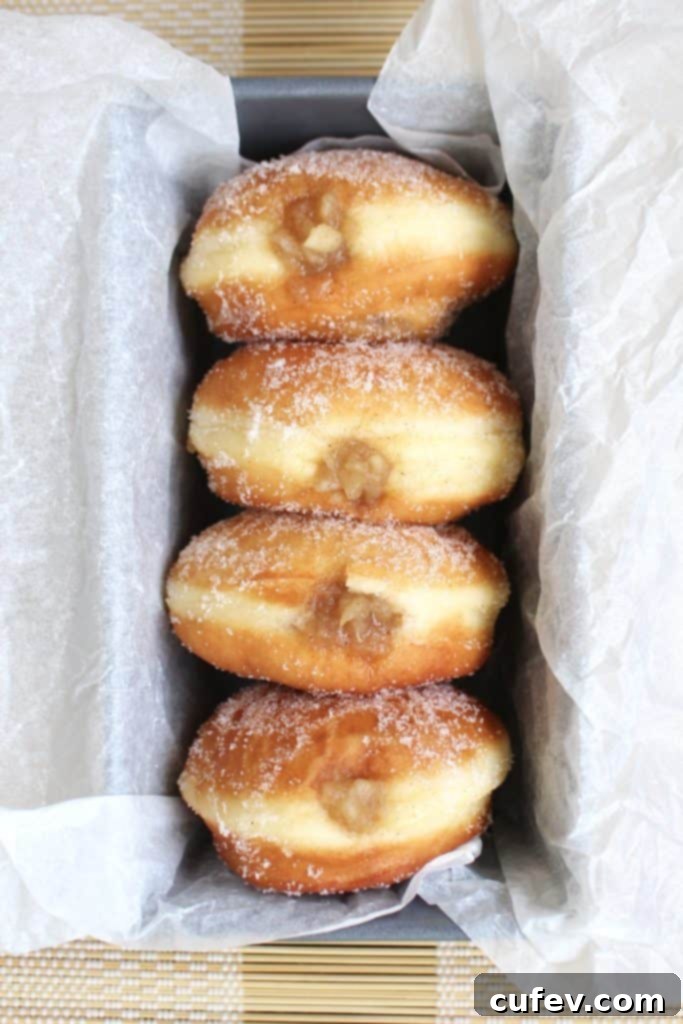
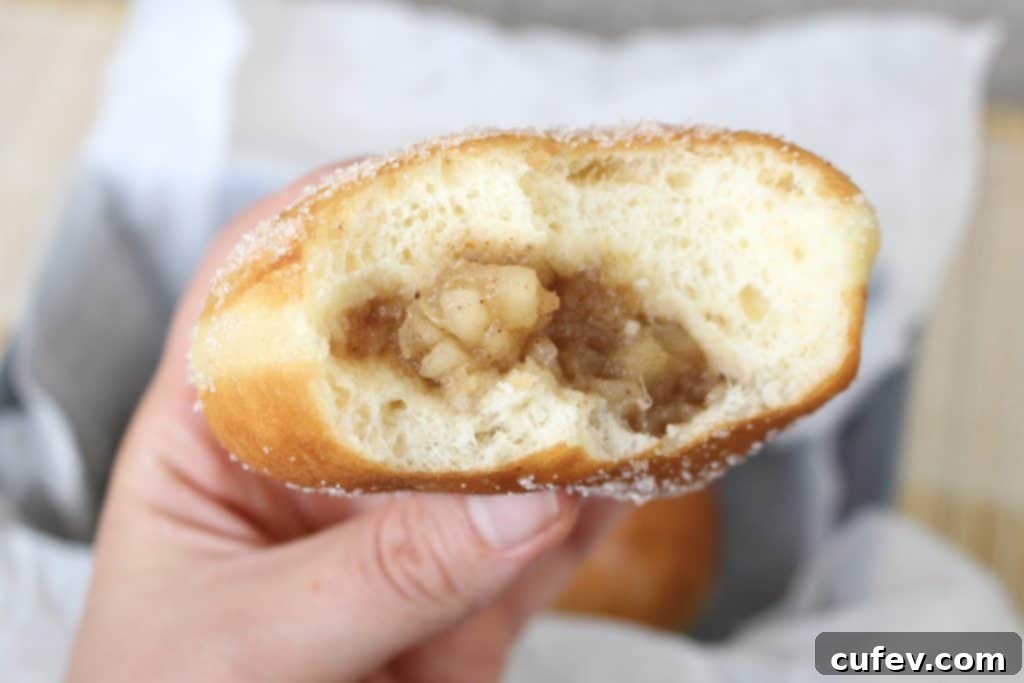
Transfer your completely cooled apple filling into a piping bag fitted with a large piping tip. Because the apple filling is chunky, a wider opening on your piping tip is essential to prevent blockages. If your tip is still too small, or if you don’t have a dedicated piping tip, don’t worry! You can use a small sharp knife or even a chopstick to carefully poke a hole into the side of each doughnut. Make the hole just large enough to accommodate the piping tip (or a small spoon, if you’re spoon-filling). Insert the piping tip into the hole and gently squeeze the bag, filling each doughnut until you feel it plump up. Be careful not to overfill, as it can cause the doughnut to burst.
Why These Apple Doughnuts Will Become Your New Obsession
These homemade apple doughnuts are a revelation. Their light and fluffy texture, combined with the warmth and spice of the apple filling, creates an experience remarkably reminiscent of a classic apple pie – but in a delightful, portable package. Unlike heavier cream-filled pastries, the fruit-based filling gives these doughnuts a refreshing lightness, making it incredibly easy to enjoy more than just one. In fact, after baking a batch, it was truly hard to stop at two; I might have indulged in three myself! They are the ultimate comfort food for a chilly autumn evening or a special weekend breakfast. The aroma alone will fill your kitchen with joy.
So, as we celebrate National Apple Month, what better way to honor this versatile fruit than with these incredible homemade apple doughnuts? They are perfect for sharing with family and friends, bringing to a fall gathering, or simply treating yourself to a moment of pure bliss. Don’t let the idea of frying deter you; the process is rewarding, and the results are absolutely worth every step. Give this recipe a try, and you’ll discover a new favorite fall dessert that perfectly captures the essence of the season.
Are you making anything special to celebrate National Apple Month? We’d love to hear your favorite apple creations!

Apple Doughnuts
Print
Pin
Rate
Ingredients
Dough
- 2¼ cups (286g) bread flour
- 2½ tablespoons granulated sugar
- ½ tablespoon fine sea salt
- 1 tablespoon skim milk powder
- ½ tablespoon active dry yeast
- 2½ tablespoons (35g) unsalted butter
- 1 egg
- ½ cup (120ml) water
Apple Filling
- 3½ cups finely chopped apples
- 1 tablespoon lemon juice
- ¼ to ½ cup light brown sugar
- 1 tablespoon cornstarch
- ½ teaspoon ground cinnamon
- ¼ teaspoon ground nutmeg
- ¼ teaspoon ground clove
Instructions
Dough
-
Place the bread flour, sugar, salt, milk powder, yeast, butter, egg, and water into a bread machine and set it on the dough setting. If using a stand mixer or hand kneading, follow the instructions in the article above for mixing and initial rise.
-
Take the dough out onto a floured surface, cover with plastic wrap and let it rest for 10min.
-
Roll it out to about ½in (1.3cm) thickness.
-
Cut out 3in (8cm) circles. Place the doughnuts on individual pieces of parchment paper, cover loosely with plastic wrap, set it somewhere warm and let them rise again until they double in size (second proof).
-
Heat your oil to 356°F (180°C) in a large, heavy-bottomed pot. Carefully fry each doughnut, about a minute and a half on each side, until golden brown.
-
Take them out onto a wire rack lined with paper towels to drain any extra oil. Coat the doughnuts with granulated sugar while they’re still warm.
Apple Filling
-
Put the finely chopped apples, 3 tablespoons of sugar, lemon juice, cornstarch, and spices in a small saucepan and cook over medium-low heat until the apples turn jammy.
-
Taste for sweetness and adjust sugar as needed.
-
When finished cooking, pour the filling into a bowl and cool completely.
Assembly
-
Put the cooled apple filling into a piping bag with a large piping tip.
-
Using a small knife or chopstick, carefully poke a hole into the side of each doughnut.
-
Insert the piping tip into the hole and fill each doughnut with the apple filling until plump.
