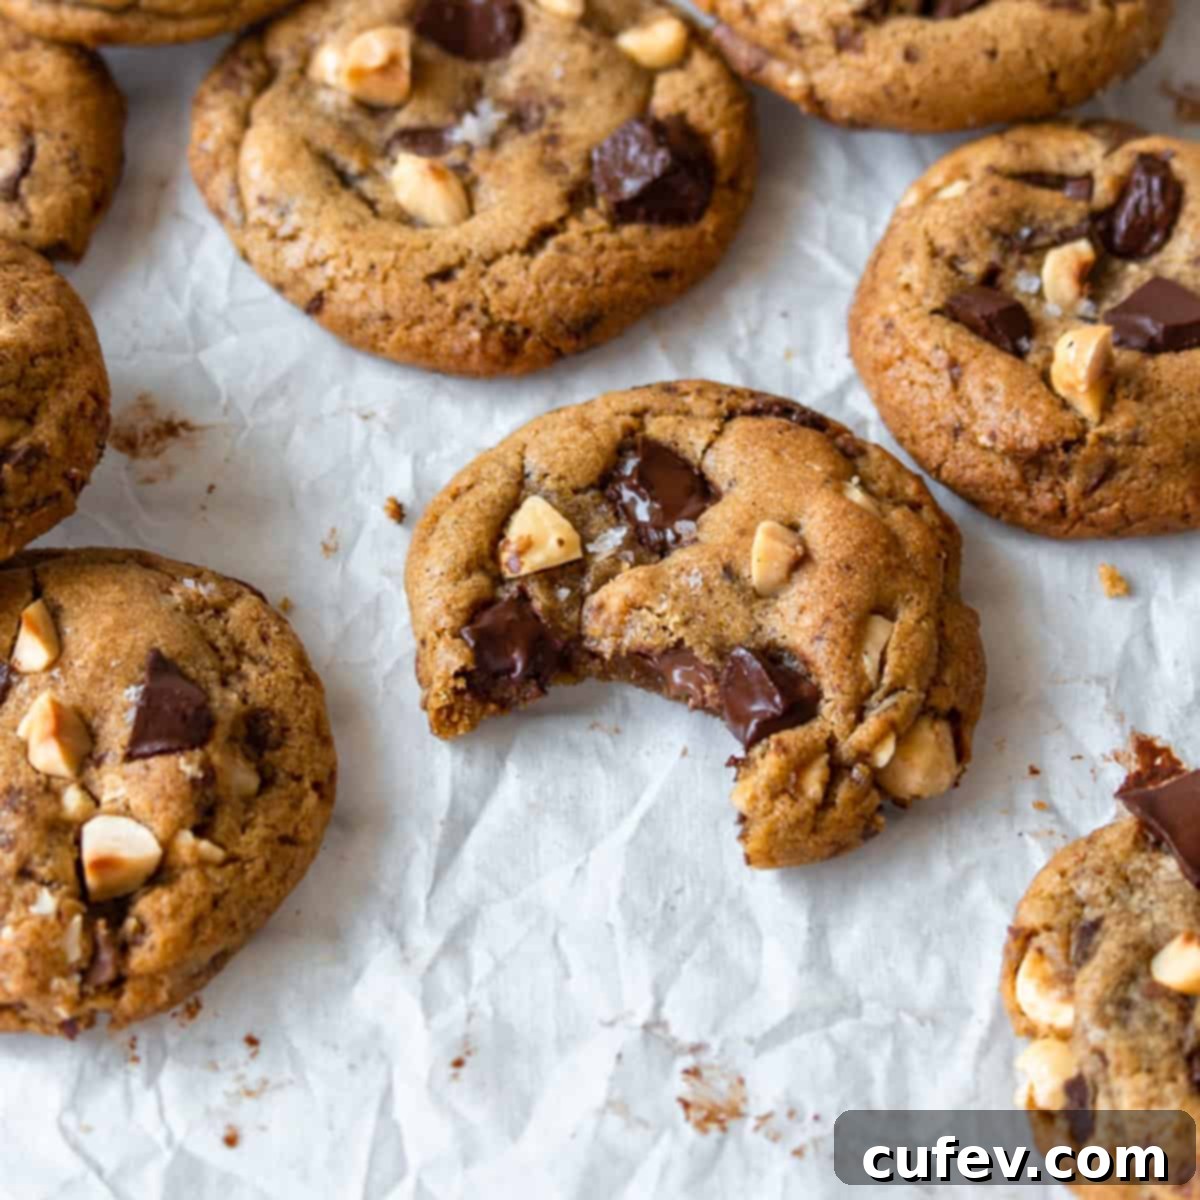
The Ultimate Guide to Irresistible Brown Butter Chocolate Chip Cookies: Achieve Perfect Chewy & Nutty Bliss
Prepare to elevate your cookie experience to an entirely new level. Once you savor the incredible depth of flavor from these brown butter chocolate chip cookies, you might find yourself saying goodbye to all other recipes! The magic lies in a simple technique that transforms ordinary butter into a rich, nutty, and aromatic foundation, which, when combined with signature crisp edges and a perfectly soft, chewy texture, creates truly the ultimate cookie experience. This comprehensive guide will walk you through every step to ensure your homemade brown butter chocolate chip cookies are nothing short of spectacular, becoming your new go-to for a truly unforgettable dessert.
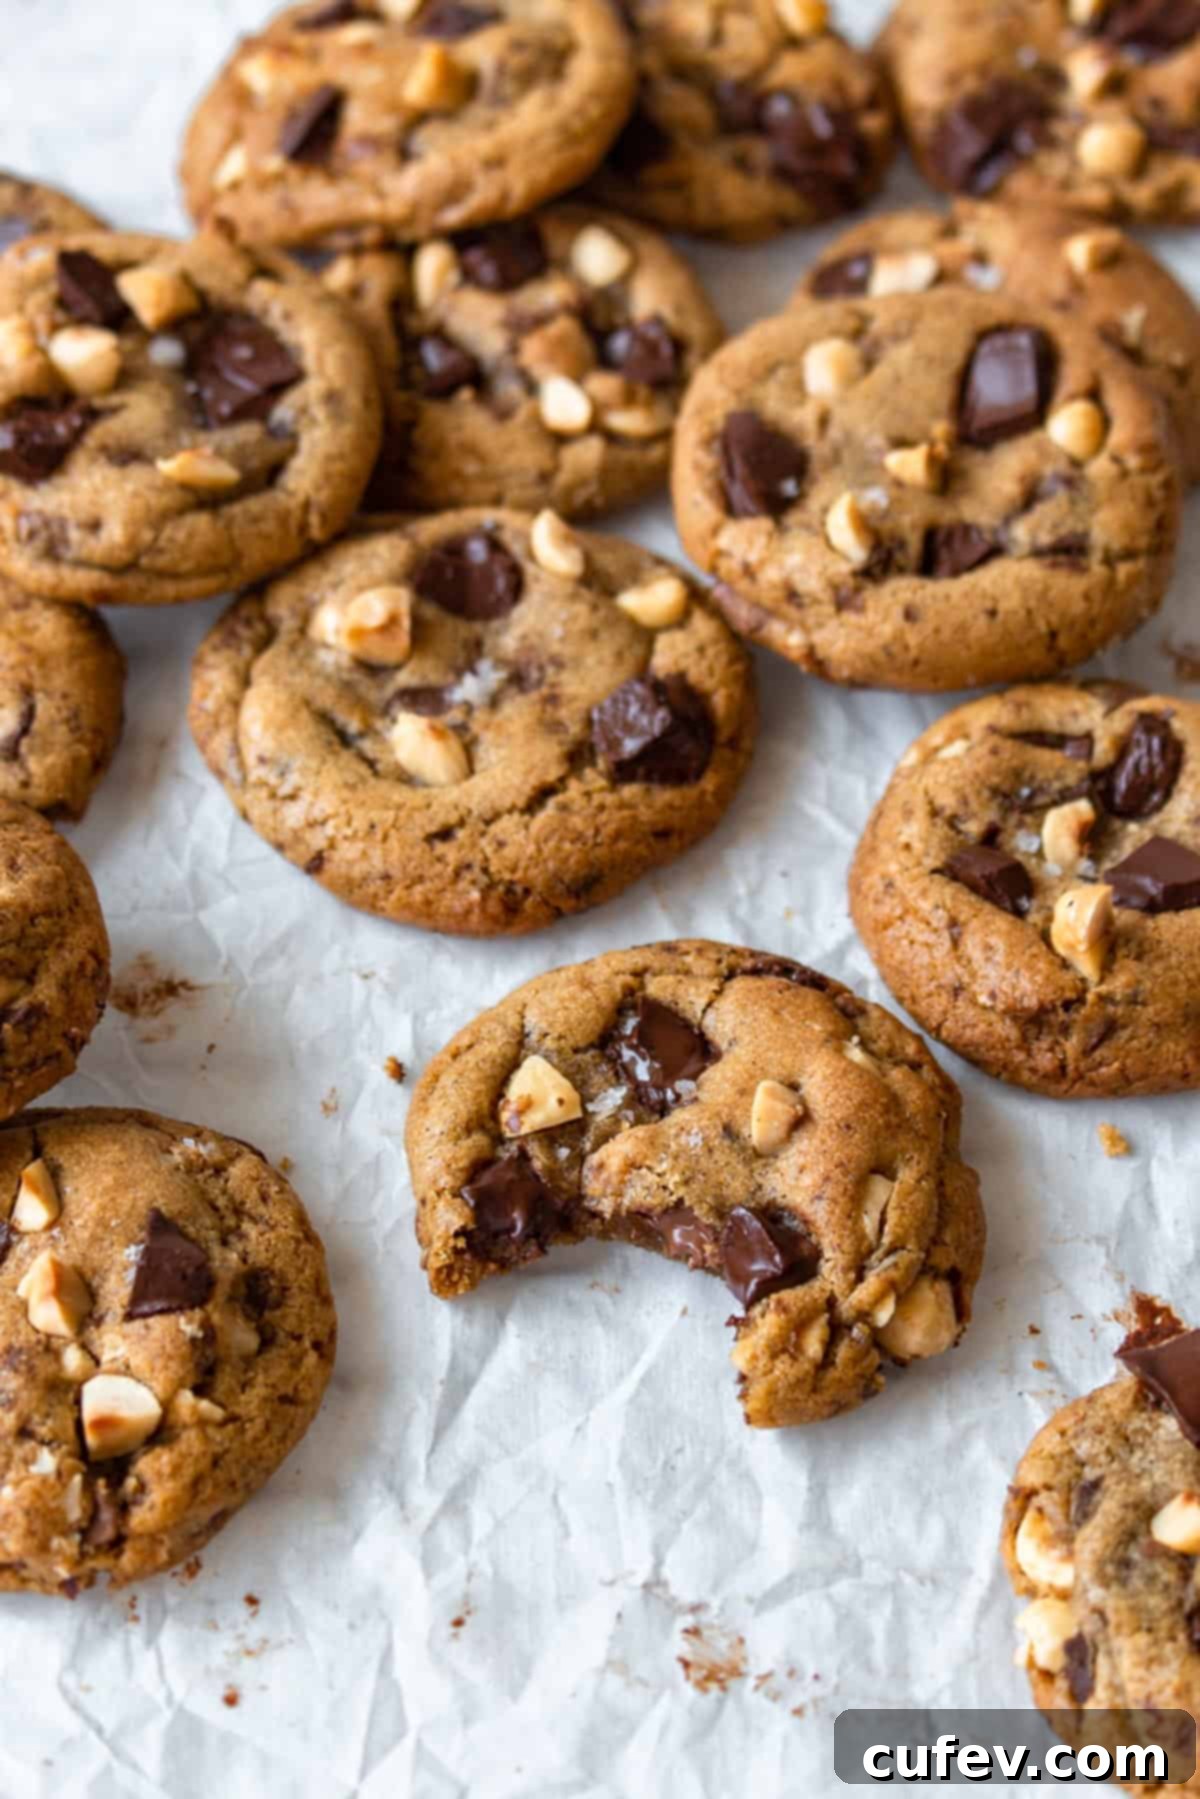
This timeless recipe was originally shared on April 6, 2016, and has been lovingly refined and updated with fresh insights and enhanced recipe information on January 23, 2024, to bring you the absolute best brown butter chocolate chip cookies possible, ensuring that every bite delivers maximum flavor and perfect texture.
Essential Ingredients for Unforgettable Brown Butter Chocolate Chip Cookies
Crafting the perfect brown butter chocolate chip cookie starts with understanding the role each ingredient plays in achieving that coveted chewy texture, complex flavor profile, and signature appeal. Here’s a detailed breakdown of what you’ll need and why each component is crucial:
- Unsalted Butter: This is unequivocally the star ingredient that sets these cookies apart. By gently heating unsalted butter in a light-colored saucepan, we activate the Maillard reaction in its milk solids, transforming them into golden-brown specks that infuse the butter with an incredible nutty, caramel-like, and deeply aromatic flavor. This “brown butter” (or beurre noisette) is vastly superior to regular butter in terms of flavor depth. Opting for unsalted butter gives you precise control over the overall saltiness of your final cookie, preventing them from becoming overwhelmingly salty.
- All-Purpose Flour: Providing the essential structure for our cookies, all-purpose flour is key to achieving that desirable balance between soft chewiness and a slight crispness without resulting in a cakey or overly dense texture. Accurate measurement, ideally by weight, is recommended for consistent results.
- Salt (Fine Sea Salt or Fine Himalayan Pink Salt): Far from being just a seasoning, salt is a flavor amplifier in baking. It masterfully enhances the rich notes of brown butter and chocolate while expertly balancing the sweetness of the sugars. This prevents the cookies from tasting cloyingly sweet and adds complexity. Fine varieties integrate seamlessly into the dough.
- Baking Soda: As our primary leavening agent, baking soda is crucial for the cookies’ characteristic spread and wonderfully chewy texture. It reacts with the natural acids present in brown sugar, producing carbon dioxide gas that helps the cookies puff slightly and develop their signature soft centers and slightly crisp edges.
- Sugar (Granulated Sugar and Brown Sugar): The harmonious blend of these two sugars is fundamental for the perfect brown butter chocolate chip cookie. Granulated sugar contributes to the crispness of the edges, promotes even spreading, and adds a bright sweetness. Brown sugar, with its inherent molasses content, introduces vital moisture, a delightful caramel depth, and that signature soft, chewy interior that defines an exceptional chocolate chip cookie.
- Eggs (Whole Egg and Egg Yolks): The thoughtful inclusion of both a whole egg and additional egg yolks serves a specific purpose. The whole egg provides structure and binding moisture, while the extra egg yolks significantly boost richness, tenderness, and chewiness, ensuring a truly decadent and satisfying bite. For optimal emulsification, ensure your eggs are at room temperature.
- Vanilla Extract (Pure or Vanilla Paste): A foundational flavor enhancer in virtually all sweet baking, pure vanilla extract elevates and harmonizes the other ingredients. For an even more intense aroma and visible flecks of vanilla bean, consider using high-quality vanilla paste. Don’t compromise on quality here, as good vanilla makes a noticeable difference.
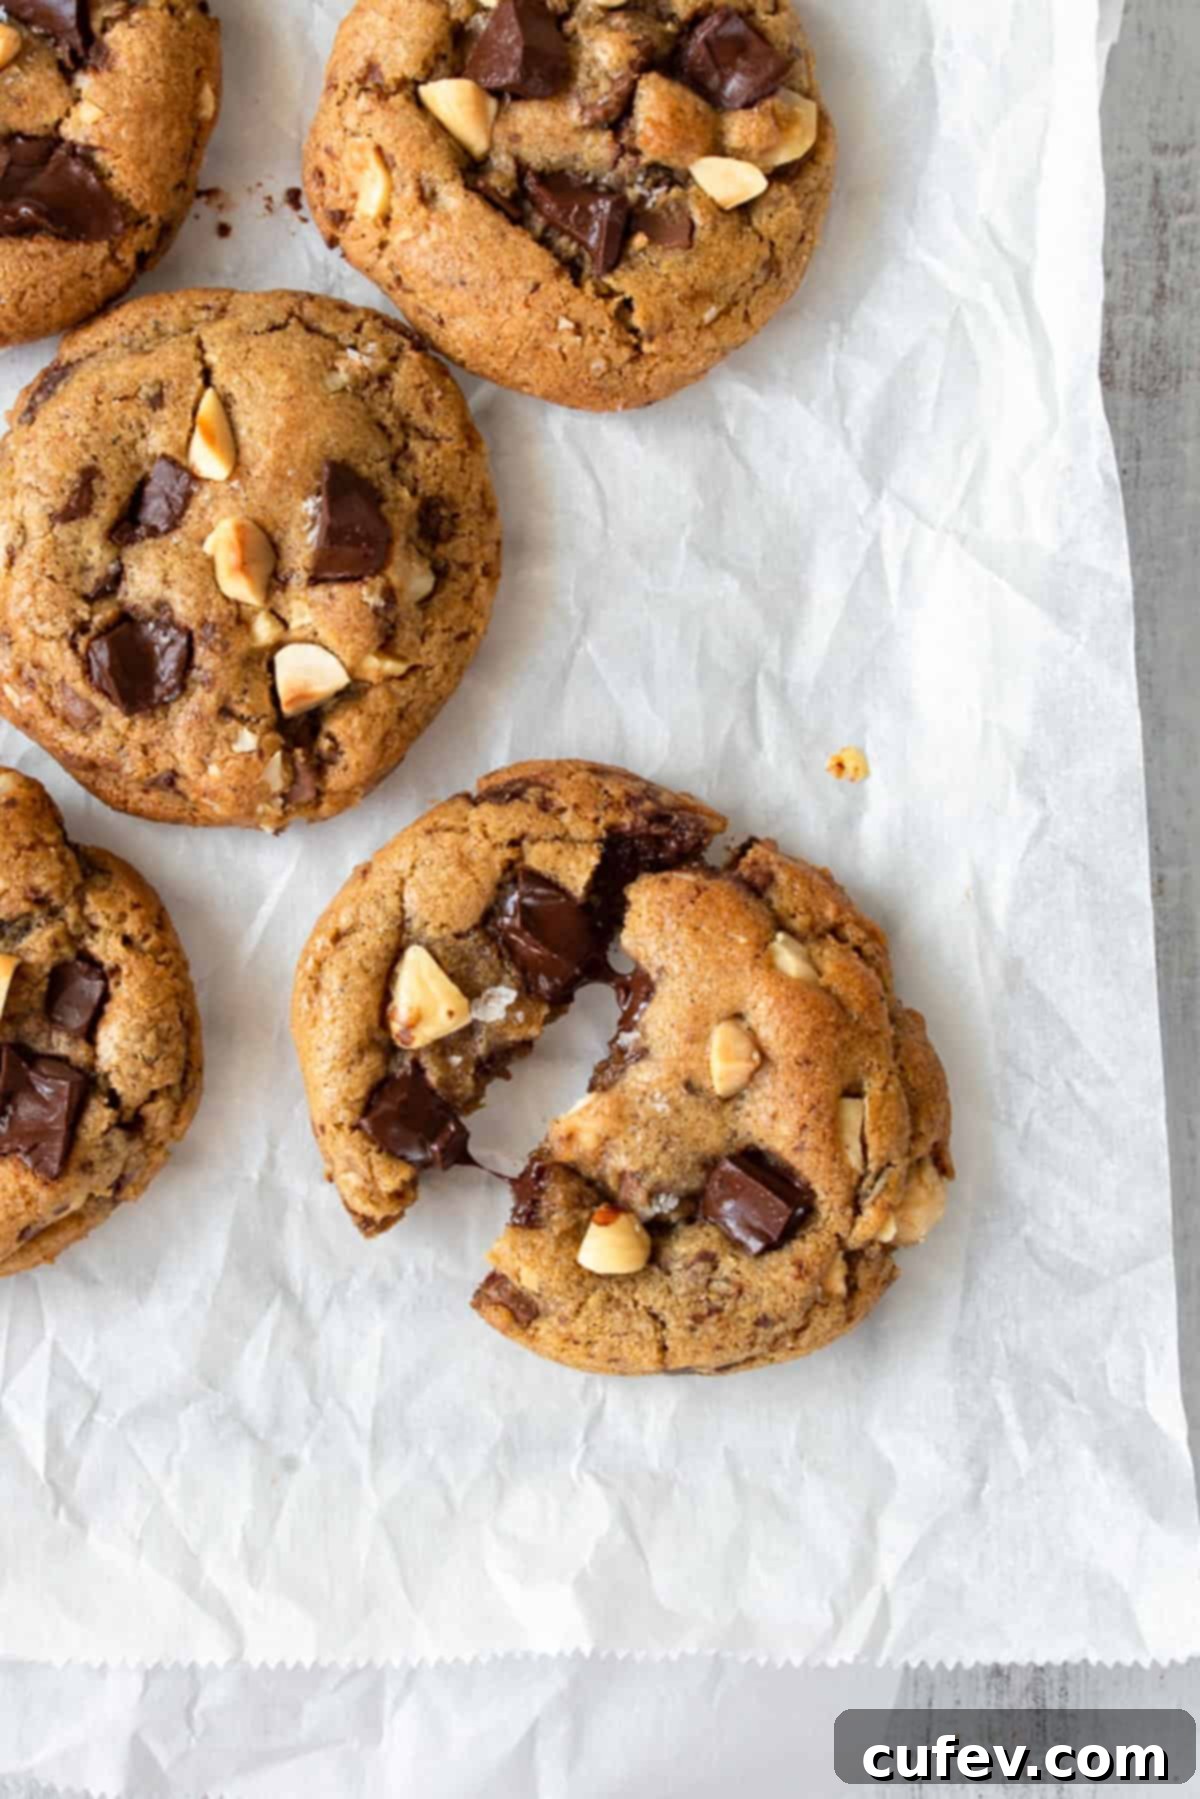
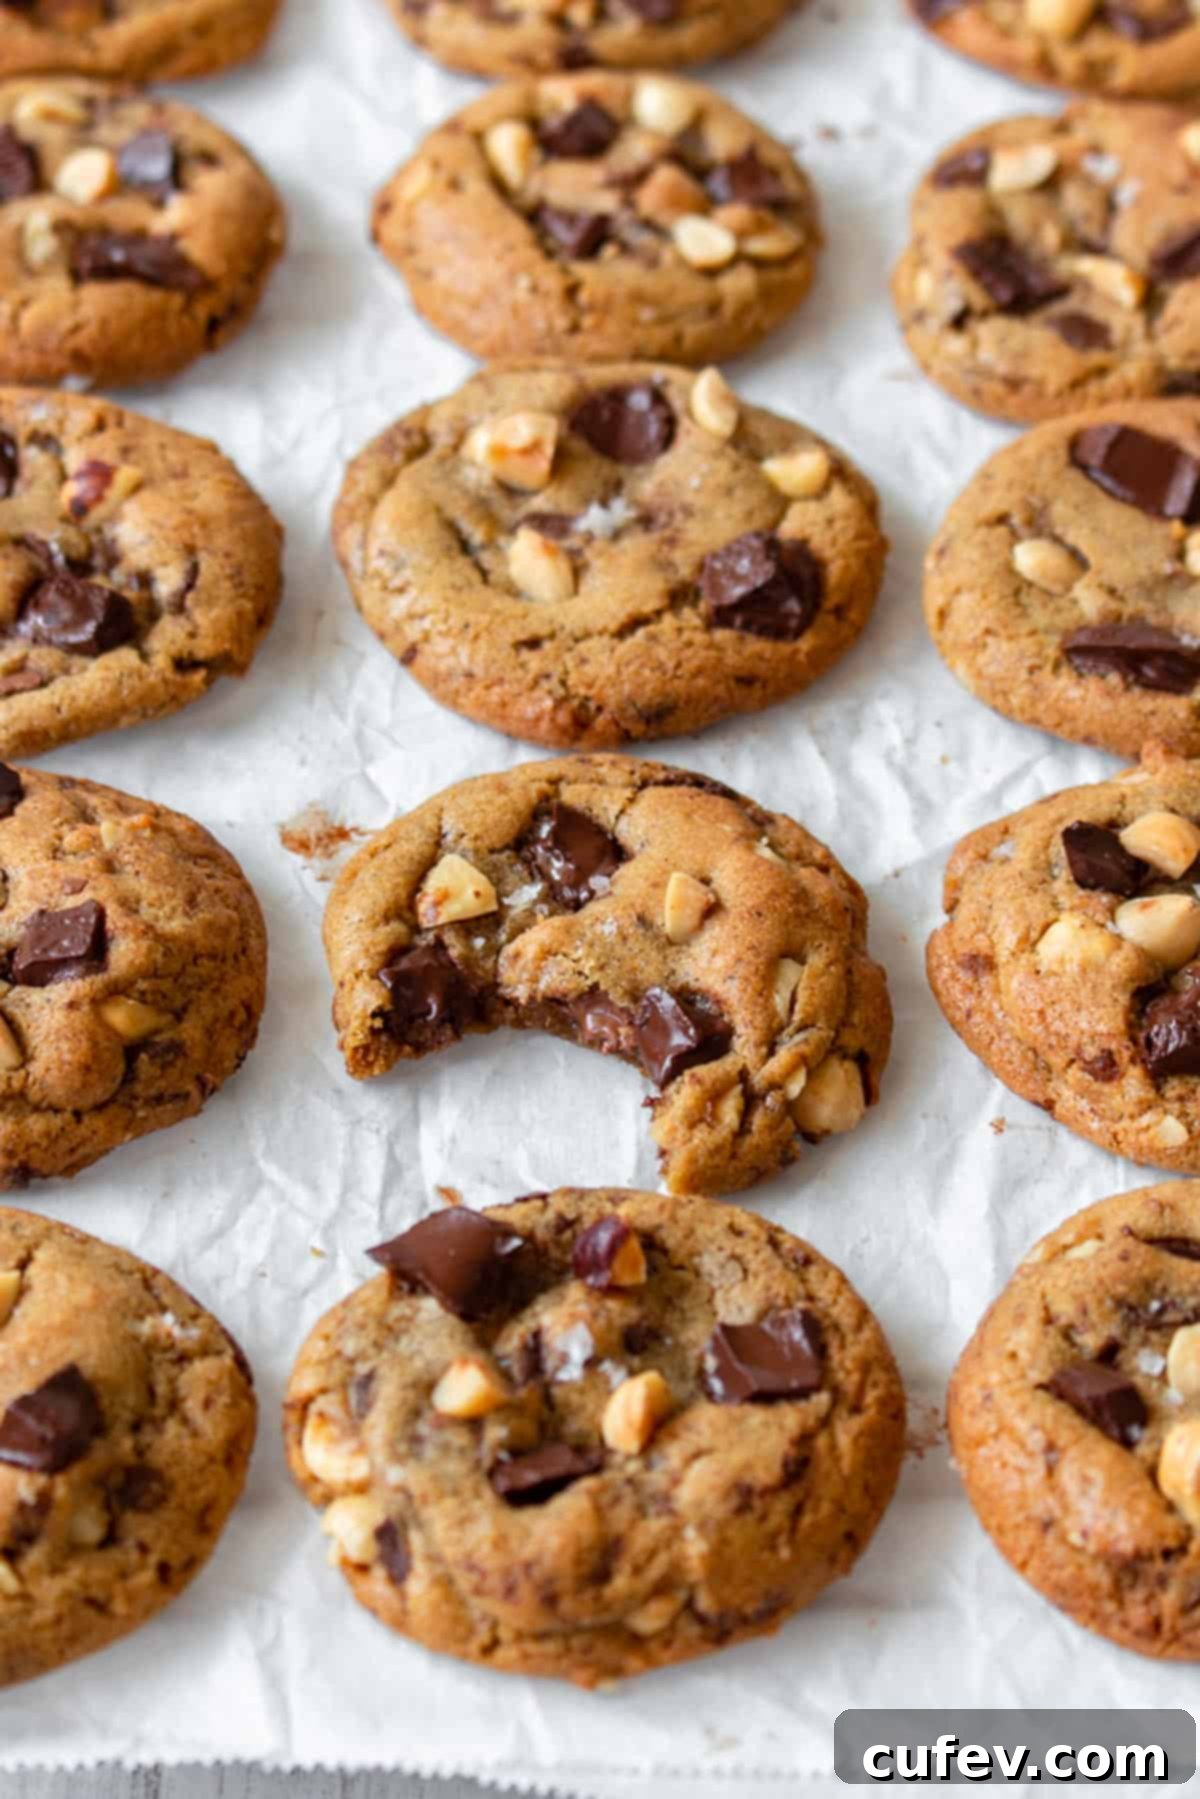
- Chocolate Chips (or Chunks): While classic semi-sweet chocolate chips offer a balanced and universally loved flavor, feel encouraged to experiment. Dark chocolate chips or generous chunks will provide a more intense, sophisticated cocoa profile, while milk chocolate will yield a sweeter, creamier indulgence. Using chocolate chunks often results in more visually appealing pools of melted chocolate throughout the baked cookie. For an elevated touch, I enthusiastically suggest adding toasted hazelnuts, as their earthy crunch and deep nutty flavor perfectly complement the browned butter and chocolate, creating a truly gourmet experience.
- Flaky Sea Salt (e.g., Fleur de Sel): This ingredient is optional but highly recommended for those seeking a professional finish. A delicate sprinkle of flaky sea salt on top of each cookie before baking offers a delightful textural crunch and an exquisite pop of salinity. This beautifully cuts through and accentuates the cookies’ rich sweetness, transforming them from merely delicious to truly extraordinary.
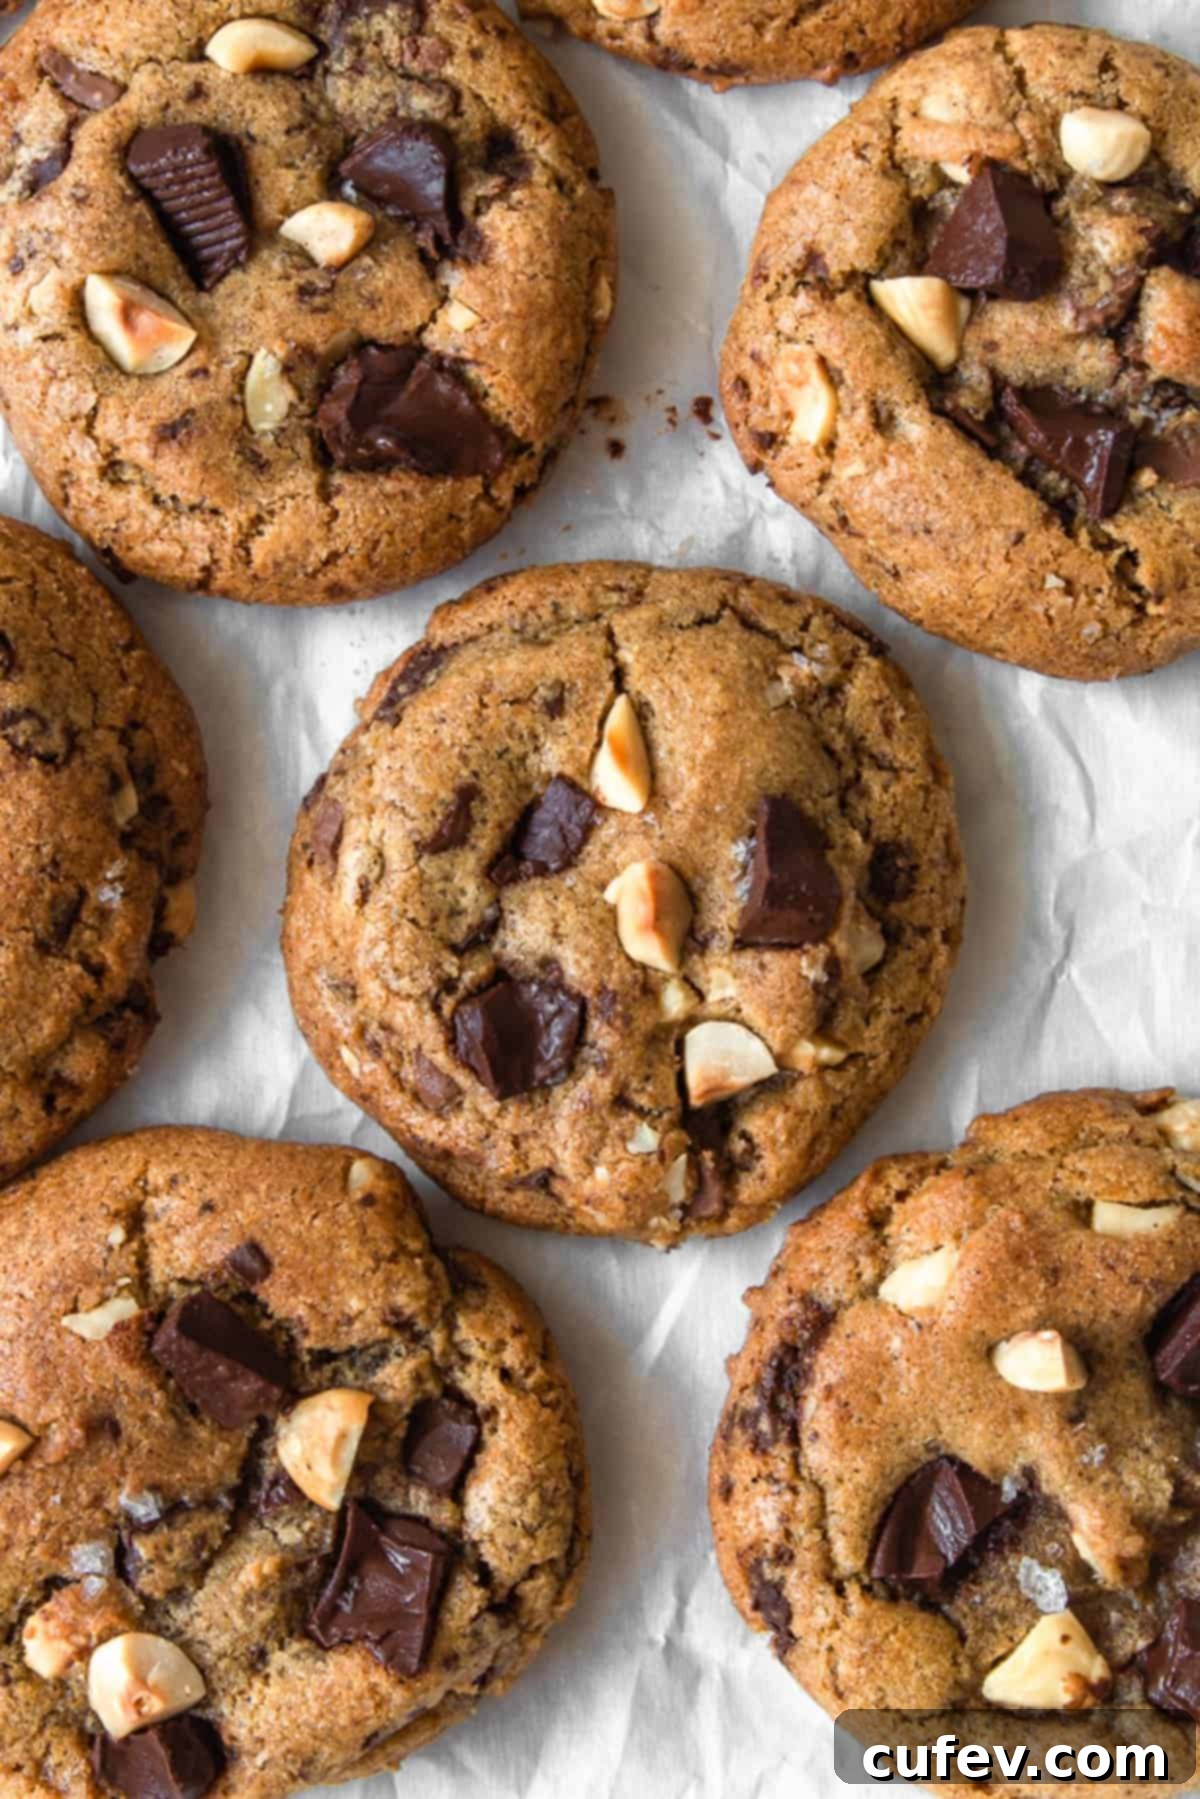
Step-by-Step Guide: How to Make the Best Brown Butter Chocolate Chip Cookies
Creating these incredible brown butter chocolate chip cookies is a rewarding experience that’s simpler than you might think, even with the transformative “brown butter” step. Follow these detailed instructions meticulously to ensure a batch of perfectly chewy, nutty, and flavorful cookies every single time.
Step 1: Prepare Your Workspace and Oven. Begin by preheating your oven to 375°F (190°C). This crucial step ensures your oven is at the precise temperature when the dough is ready, promoting even baking, optimal cookie spread, and preventing a dense, undercooked result. Line two large baking sheets with high-quality parchment paper. Parchment paper is indispensable for preventing sticking, ensuring easy removal, and contributing to perfectly golden and evenly baked bottoms. Set these prepared sheets aside while you tackle the next steps.
Step 2: Master the Art of Browning the Butter. Place your precisely cubed unsalted butter into a light-colored saucepan. Using a light-colored pan is advantageous as it allows you to easily monitor the crucial browning process and prevent accidental burning. Cook the butter over medium heat, stirring frequently with a heat-resistant spatula, for approximately 5-8 minutes. The butter will first melt, then begin to foam, and eventually, the milk solids will separate and settle at the bottom of the pan. These solids will gradually turn a beautiful golden to amber brown, releasing an intoxicating nutty, caramel-like aroma – this is the Maillard reaction in action! Be highly vigilant during this stage, as butter can go from perfectly browned to burnt in mere seconds. Once you detect that rich aroma and see the desired color, immediately remove the saucepan from the heat. In a large, heat-proof mixing bowl, combine the brown sugar and granulated sugar. Carefully pour the hot browned butter over the sugars. Crucially, use your rubber spatula to scrape every last bit of those flavorful browned solids from the bottom of the saucepan into the sugar mixture – these bits are concentrated flavor bombs! Stir vigorously to combine the butter and sugars, then set the mixture aside to cool slightly. It should still be warm but not hot enough to scramble an egg when you add the eggs in the next step (approximately 10-15 minutes).
Step 3: Whisk Together the Dry Ingredients. While your brown butter and sugar mixture is cooling, grab a separate medium-sized bowl. Add the all-purpose flour, baking soda, and fine sea salt. Take your time to whisk these dry ingredients together thoroughly for at least 30 seconds. This step is vital to ensure that the leavening agent and salt are evenly distributed throughout the flour, guaranteeing consistent texture and flavor in every single cookie you bake.
Step 4: Incorporate the Wet Ingredients. Once the brown butter and sugar mixture has cooled to a warm (but not hot) temperature, it’s time to add the eggs. Incorporate the large whole egg first, followed by the two additional egg yolks, adding them one at a time. Stir well after each addition until each egg is fully incorporated into the mixture. This gradual addition helps to create a smooth, emulsified mixture. Finally, stir in the pure vanilla extract until just combined, infusing the dough with its fragrant and comforting essence. Avoid overmixing at this stage.
Step 5: Gently Combine Wet and Dry, Then Fold in Chocolate and Mix-ins. Pour the whisked dry flour mixture into the brown butter and egg mixture. Using a sturdy rubber spatula or a wooden spoon, mix the ingredients together only until just combined. The absolute key here is not to overmix the dough; stop stirring when there are still a few patches of flour visible. Overmixing develops the gluten in the flour, which will inevitably lead to tough, dense, and less-than-chewy cookies. At this precise point, add your chocolate chips (or chunks) and any optional mix-ins, such as the toasted hazelnuts. Gently fold them into the dough until they are evenly distributed and no streaks of dry flour remain. Remember, a light hand ensures a tender cookie.
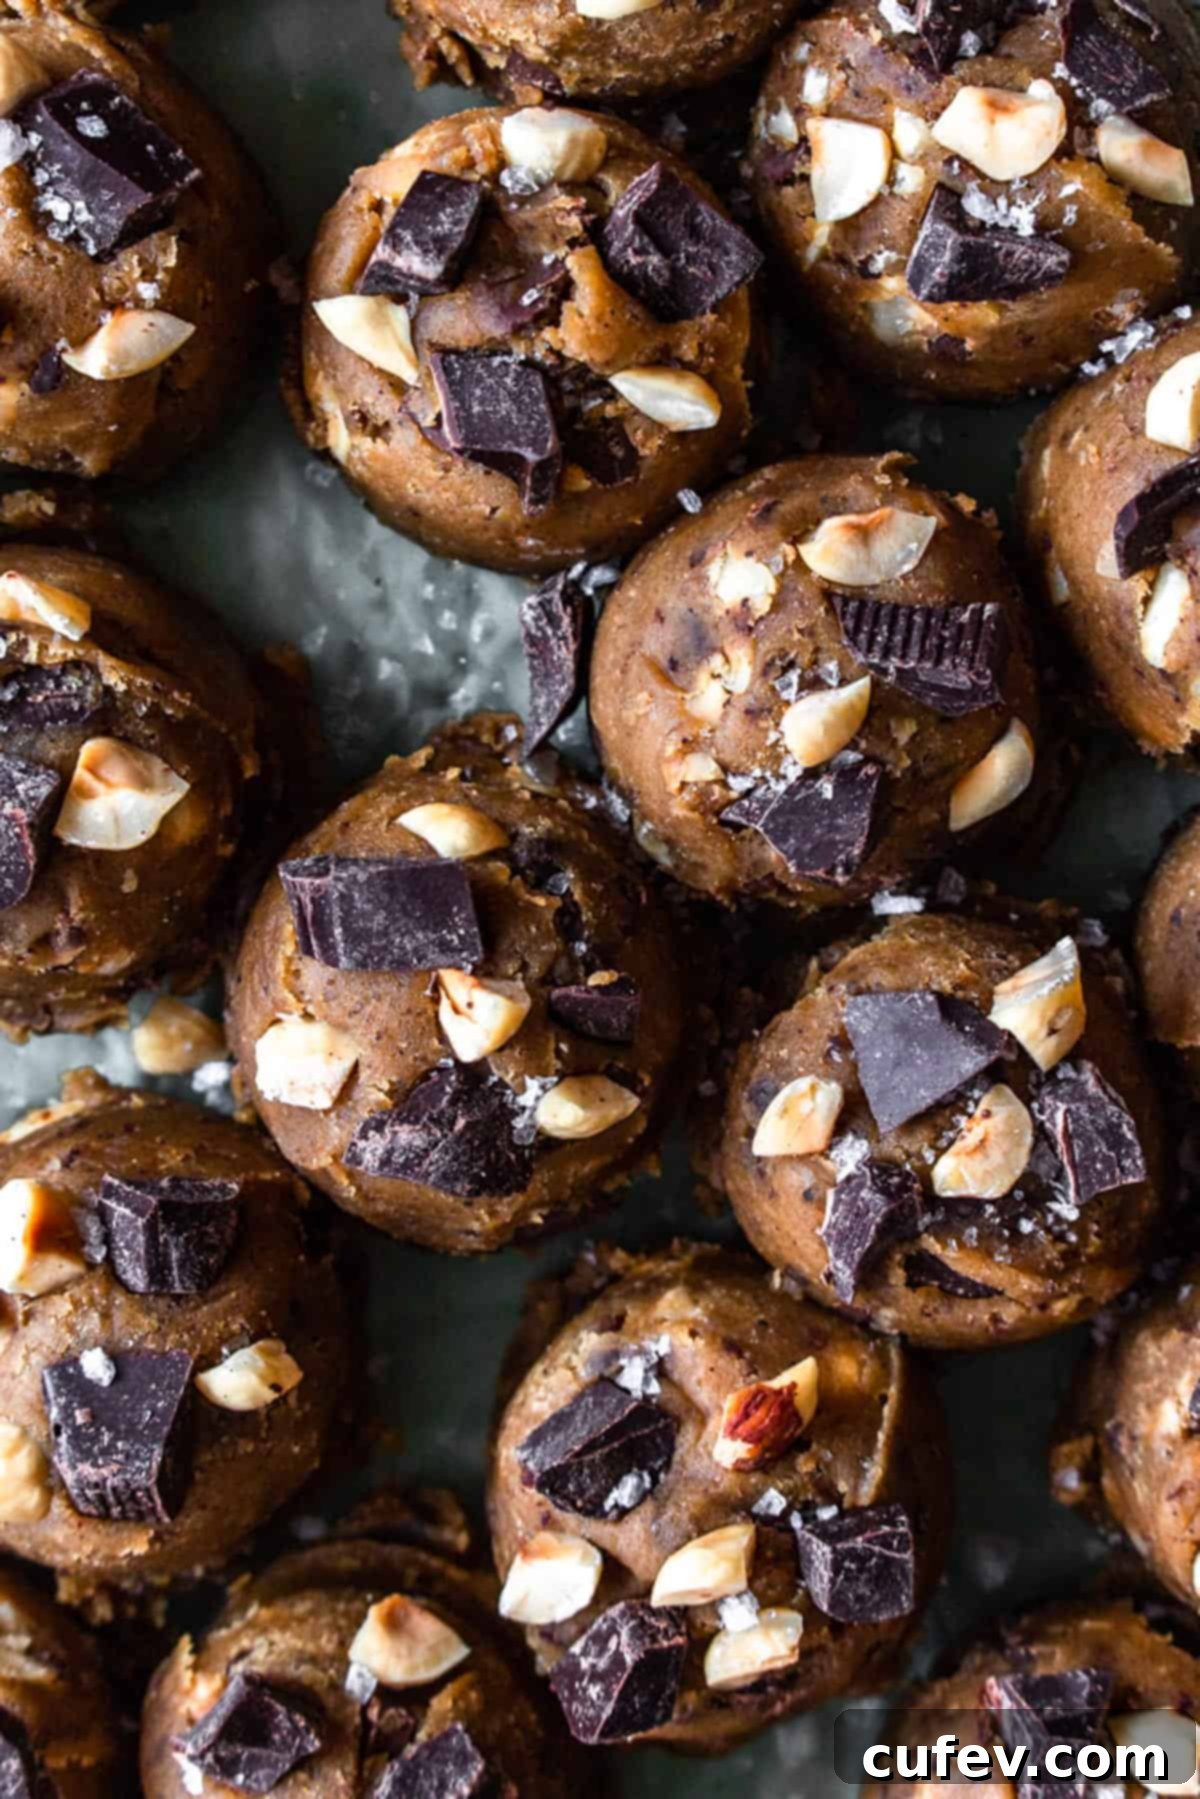
Step 6: Scoop, Top, and Bake to Perfection. Using a standard cookie scoop (a 4-teaspoon capacity scoop works wonderfully for consistent medium-sized cookies), portion out the dough onto your parchment paper-lined baking sheets. Ensure you leave ample space between each dough ball (approximately 2 inches) to allow for proper spreading during baking. For that professional, bakery-quality appearance, gently press a few extra chocolate chips and/or chopped hazelnuts onto the top of each scooped dough ball. Finish with a delicate sprinkle of flaky sea salt on each cookie. Bake the cookies in your preheated oven for 6-8 minutes. The exact baking time will vary slightly depending on your specific oven and your desired level of crispness; however, cookies are typically done when the edges are set and beautifully golden brown, while the centers still appear slightly soft and gloriously gooey. This slight underbaking is paramount for achieving that coveted chewy center. Once removed from the oven, and here’s another crucial tip, allow them to cool completely on the baking sheet. They will continue to set, firm up, and develop that perfect chewy texture as they cool, making them irresistible.
Pro Tips for Baking the Best Brown Butter Chocolate Chip Cookies
Achieving consistently bakery-quality brown butter chocolate chip cookies involves more than just following the steps; it’s about understanding the nuances of baking. Here are some invaluable tips and tricks to perfect your batch every single time:
- Ensure Room Temperature Ingredients: This is a fundamental principle in successful baking, especially for cookies. Ingredients like butter and eggs, when at room temperature, emulsify much more effectively with the sugars. This creates a smoother, more homogeneous, and stable dough structure. The result is a more consistent texture, better flavor distribution, and a superior rise in your baked cookies. Make it a habit to take your eggs and butter out of the fridge at least 30-60 minutes before you plan to start baking.
- Utilize a Digital Kitchen Scale for Accuracy: Baking is a precise science, and accurate measurements are paramount for consistent and reproducible results. While cup measurements are provided, using a digital kitchen scale to weigh your flour (ideally 120g per cup) and butter is the best way to ensure these chewy brown butter chocolate chip cookies come out perfectly structured and delicious every single time. Volume measurements can be notoriously inaccurate due to packing differences.
- Do Not Overmix the Dough: This tip cannot be emphasized enough. Once you add the flour to the wet ingredients, mix only until just combined. You should still see a few small streaks of flour remaining before you fold in your mix-ins. Overmixing rapidly develops gluten, which toughens the dough and will lead to hard, dense, and less desirable cookies instead of the soft, chewy texture you’re aiming for. A gentle, light hand is absolutely key!
- Get Creative with Your Mix-ins: While classic semi-sweet chocolate chips are undeniably delicious, these brown butter cookies provide a fantastic and versatile canvas for culinary experimentation. My personal favorite combination is a blend of high-quality dark chocolate chunks (for deep, intense flavor and glorious molten pools of chocolate) with crunchy, earthy toasted hazelnuts (if you have them in your pantry, learn how to properly roast hazelnuts for maximum flavor). But don’t feel limited! Consider additions like white chocolate, colorful M&M’s, toasted walnuts or pecans, buttery toffee bits, or even a delightful mix of different chocolate varieties for a complex and exciting flavor profile.
- Add Extra Chocolate on Top for Bakery Appeal: For an aesthetically stunning cookie that looks like it just came from a professional bakery, gently press a few extra chocolate chips or chunks onto the top of each scooped cookie dough ball just before they go into the oven. This simple trick ensures that beautiful pools of melted chocolate are visible on the surface of your baked cookies, making them utterly irresistible and incredibly appealing. After all, who ever complained about too much chocolate in a cookie?
- Resist the Urge to Overbake: For that perfect soft, gooey, and ultra-chewy center with just-crisp edges, it is best to slightly underbake these cookies. They might appear a little underdone or very soft when you first pull them from the oven, but rest assured, they will continue to cook and set as they cool on the hot baking sheet. Baking them for even an extra minute or two beyond this point can quickly transform them from deliciously chewy to dry and crumbly, diminishing their ideal texture.
- Consider a Dough Chill (Optional but Flavor-Enhancing): While this specific brown butter chocolate chip cookie recipe is designed to yield fantastic results without a chilling period, taking the extra step to chill the dough can enhance them even further. A brief chill (30 minutes to an hour, or even overnight) allows the brown butter flavor to deepen and mingle more intensely with the other ingredients. It also helps the flour hydrate more thoroughly, resulting in a slightly chewier cookie and often leads to less spread during baking. If you have the time, it’s a worthwhile experiment!
- Store Some Dough for a Rainy Day: It’s always tempting to bake the entire batch immediately, but I highly recommend scooping out any extra cookie dough balls and storing them in a freezer-safe bag or airtight container. You can safely keep them in the freezer for up to 2 months. When a sudden cookie craving strikes, simply bake them directly from frozen, adding an extra minute or two to the regular baking time. This strategy ensures you always have freshly baked, warm, and delicious cookies on demand!
Frequently Asked Questions About Brown Butter Chocolate Chip Cookies
Here are answers to some common questions and troubleshooting tips to help you master making and enjoying these delectable brown butter chocolate chip cookies:
Browned butter, famously known as beurre noisette, completely transforms the flavor profile of cookies. It goes far beyond the simple nutty undertones that regular butter provides. Through a process called the Maillard reaction, the milk solids within the butter toast and caramelize, creating incredibly complex, deeply caramelized notes reminiscent of rich butterscotch, toasted nuts, and a sophisticated, savory sweetness. This transformation adds an extraordinary depth and gourmet sophistication to your cookies, making them far more flavorful, aromatic, and unique than any cookie made with unbrowned butter.
While we highly encourage you to try browning the butter for the full experience, if you’re truly short on time or simply prefer a more classic, traditional flavor, you can certainly make these cookies with regular unsalted butter. To do so, simply use approximately a little over ¾ cup (170g) of softened unsalted butter and proceed with the recipe, skipping the browning step entirely. However, please be aware that by omitting this step, you will be missing out on the distinct, rich, and nutty flavor profile that only brown butter can impart. We genuinely believe the extra few minutes for browning are incredibly worthwhile!
No, not strictly! One of the fantastic advantages and time-saving aspects of this particular brown butter chocolate chip cookie recipe is that it doesn’t actually require chilling the dough. You have the convenience to mix the dough and bake them immediately, making them an ideal choice for those spontaneous cookie cravings. While a brief chill can sometimes deepen flavors or slightly reduce spread, this specific recipe is meticulously designed to deliver incredible results and a perfect texture without that extra waiting period. Hooray for instant gratification and delicious cookies!
Yes, absolutely! Both the baked cookies and the raw cookie dough freeze exceptionally well, offering fantastic convenience. To freeze baked cookies, ensure they are completely cooled to room temperature. Then, wrap each cookie individually in plastic wrap to prevent freezer burn and place them in an airtight freezer bag or container. For freezing raw cookie dough, scoop the dough balls as directed onto a parchment-lined baking sheet and freeze them until they are firm. Once solid, transfer the frozen dough balls to an airtight freezer-safe bag. You can safely store both baked cookies and raw dough in the freezer for up to 2 months. When you’re ready to bake from frozen dough, simply add an extra minute or two to the specified baking time.
To maintain their delicious chewy texture and fresh flavor, once your brown butter chocolate chip cookies are completely cooled, store them in an airtight container at room temperature. They will remain wonderfully fresh and enjoyable for up to 4 days. If you find that they start to lose a bit of their initial chewiness over time, a quick 10-second zap in the microwave can work wonders to revive their softness and bring back that fresh-baked warmth!
Yes, you absolutely can adapt this recipe to be gluten-free! To do so, simply substitute the all-purpose flour with an equal amount (by weight, if possible) of a good quality 1-to-1 gluten-free flour blend that explicitly contains xanthan gum. It is often beneficial to allow the gluten-free dough to rest for about 30 minutes after mixing, prior to baking, as this gives the alternative flours ample time to properly hydrate and improves the final texture. For a dedicated and proven gluten-free chocolate chip cookie recipe, you might also be interested in trying my popular best gluten-free chocolate chip cookies!
Browning butter is an art that relies heavily on careful observation! Always start with a light-colored saucepan, as this makes it much easier to discern the color changes. As the butter melts and heats, it will first become clear, then begin to foam vigorously. Continue stirring during this process. The foam will eventually subside, and you’ll then start to notice tiny golden-brown flecks forming at the bottom of the pan. Simultaneously, the butter itself will deepen in color to a rich amber, and you’ll be enveloped by a distinct, irresistible nutty aroma, reminiscent of toasted nuts or sweet caramel. Immediately remove the saucepan from the heat once you reach this stage, as it can transition from perfectly browned to unfortunately burnt in mere seconds. Trust your senses of sight and smell!
The strategic combination of brown sugar and granulated sugar is incredibly crucial for achieving the ideal texture, spread, and complex flavor profile of these brown butter chocolate chip cookies. Granulated sugar plays a vital role in providing structure, aiding in the cookie’s spread, and contributing to those wonderfully crisp edges that everyone loves. Brown sugar, on the other hand, with its natural molasses content, introduces essential moisture to the dough, ensuring a soft, delightfully chewy interior. It also imparts a beautiful, deeper caramel-like flavor that perfectly complements the rich, nutty notes of the browned butter. Relying solely on one type of sugar would result in a distinctly different cookie texture – either too crispy and flat or too soft and cake-like – losing the signature balance we aim for.
More Irresistible Cookie Recipes to Explore
If you’re a true cookie enthusiast and loved the incredible depth of flavor in these brown butter chocolate chip cookies, you’ll surely enjoy exploring even more delectable options from my kitchen. Each recipe offers a unique and satisfying twist on classic cookie indulgence:
- If your craving leans towards an even more intensely chocolatey experience, my fudgy double chocolate chip cookie recipe is an absolute must-try. These rich, decadent cookies are a true chocolate lover’s dream, bursting with deep cocoa flavor in every bite!
- Do you adore a cookie generously loaded with an exciting array of textures and flavors? Then these kitchen sink cookies are crafted just for you! They’re playfully packed with classic chocolate chips, sweet and buttery toffee bits, delightfully salty pretzels, and even crunchy potato chips for an unexpectedly delicious and addictive combination of sweet and savory.
- For those who follow a dairy-free diet but are still seeking an incredibly soft, wonderfully chewy, and truly satisfying treat, these dairy-free peanut butter cookies are a revelation. They are perfectly moist and never dry or crumbly, proving that dairy-free baking can be just as delicious!
I truly hope you adore these Browned Butter Chocolate Chip Cookies as much as I do. They are a testament to how a simple, yet thoughtful tweak can transform a beloved classic into something truly extraordinary and unforgettable. For more mouth-watering dessert inspiration, expert baking tips, and exciting culinary adventures, make sure to follow me on Pinterest, Facebook, and Instagram. Don’t miss out on any new content or exclusive recipes – you can also get all of my newest posts, helpful updates, and sweet inspiration delivered straight to your inbox by signing up for my email newsletter!
Brown Butter Chocolate Chip Cookie Recipe
Adapted from Bon Appétit
Print
Pin
Rate
Ingredients
- ¾ cup unsalted butter cubed, for browning
- 1 cup light or dark brown sugar packed
- ¼ cup granulated sugar
- 1 large egg room temperature
- 2 egg yolks from large eggs, room temperature
- 2 teaspoons pure vanilla extract or vanilla paste
- 2 cups all-purpose flour measured by weight is best, about 240g
- ¾ teaspoon fine sea salt
- ¾ teaspoon baking soda
- 7 oz good quality chocolate chopped into chips or chunks (semi-sweet, dark, or milk)
- ⅔ cup toasted hazelnuts, chopped optional, or other nuts/mix-ins
- flaky sea salt for sprinkling on top (e.g., fleur de sel)
Instructions
-
Preheat your oven to 375°F (190°C). Line two large baking sheets with parchment paper; set them aside.
-
In a large, heat-proof bowl, combine the brown sugar and granulated sugar. Set this bowl aside.
-
Place the cubed unsalted butter in a light-colored saucepan over medium heat. Cook, stirring occasionally, until the butter melts, foams, and the milk solids at the bottom turn a rich golden brown, emitting a nutty aroma (approximately 5-8 minutes). Immediately remove from heat. Carefully pour the hot browned butter over the sugars in the prepared bowl, making sure to scrape all the delicious browned bits from the bottom of the pan into the sugar mixture. Stir well and allow to cool slightly for about 10-15 minutes.
-
In a separate medium bowl, whisk together the all-purpose flour, baking soda, and fine sea salt until thoroughly combined.
-
Once the brown butter-sugar mixture has cooled (it should still be warm but not hot), add the large whole egg and the two egg yolks one at a time, stirring well after each addition until fully incorporated. Stir in the vanilla extract until just combined.
-
Gradually add the flour mixture to the wet ingredients. Mix with a spatula or wooden spoon until just combined and a few streaks of flour remain. Fold in the chopped chocolate and toasted hazelnuts (if using) until no dry streaks of flour are visible. Be careful not to overmix.
-
Using a 4-teaspoon capacity cookie scoop, drop rounded balls of dough onto the parchment-lined baking sheets, leaving about 2 inches between each. Optionally, press a few extra chocolate chips and/or hazelnuts onto the top of each dough ball, then sprinkle with a pinch of flaky sea salt. Bake for 6-8 minutes, or until the edges are golden brown and the centers are still slightly soft. Remove from oven and let cool completely on the baking sheets to allow them to set and achieve their perfect chewy texture.
